
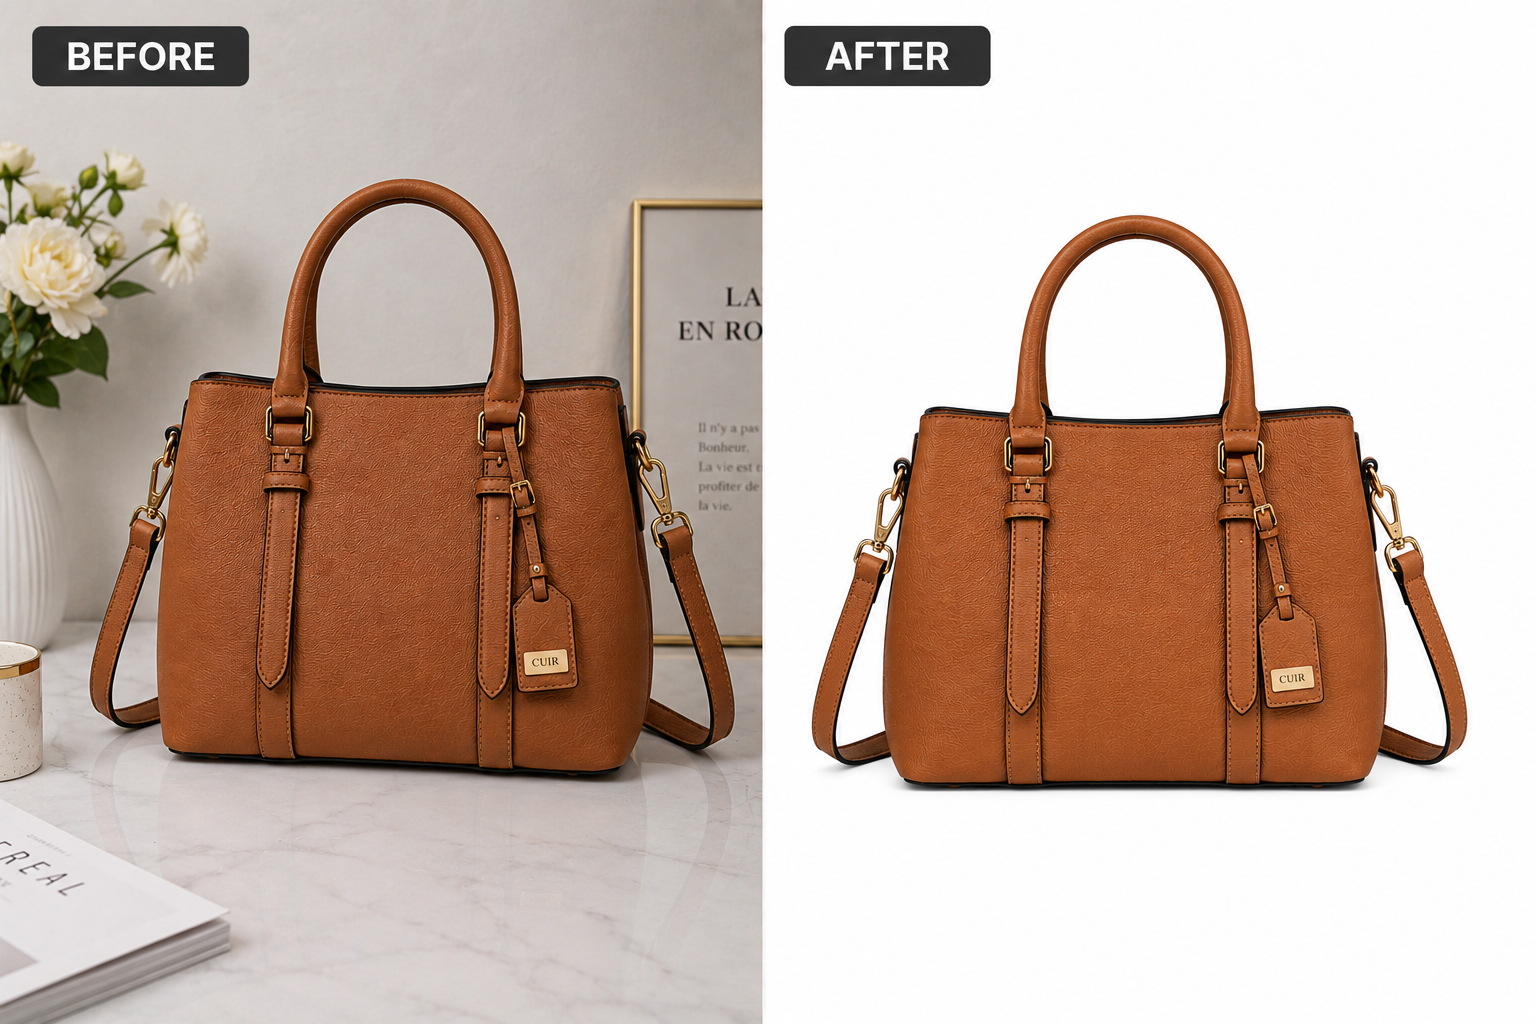
A good clipping path service can be the difference between a product photo that looks amateur and one that looks like it belongs on a top-selling Amazon or Shopify listing. If you sell online or shoot product photography for a living, chances are you’ve already run into the limits of a plain background-eraser tool — messy edges, leftover shadows, or a cutout that just doesn’t look clean. That’s exactly the problem a professional clipping path solves.
In this guide, we’ll cover what a clipping path actually is, how it’s created, when to do it yourself versus outsource it, and how to pick a provider you can trust.
What Is a Clipping Path Service?
A clipping path is a vector outline drawn precisely around the edges of a subject in a photo. Everything inside that outline stays; everything outside it is removed or replaced. A clipping path service is simply the professional work of creating that outline — usually with Photoshop’s Pen tool — so a product, model, or object can be isolated from its original background.
Once the path is created, you can:
- Drop the subject onto a pure white or transparent background (required by most marketplaces)
- Swap in a lifestyle or branded background
- Recolor or adjust just the subject, without touching the background
- Combine multiple product shots into a clean catalog-style layout
Unlike a quick “magic wand” selection or an AI auto-cutout, a hand-drawn clipping path holds up on hard edges, fine details, and reflective surfaces — jewelry, glassware, electronics, and clothing with sharp lines all benefit from the extra precision.
Clipping Path vs. Photo Masking
It’s worth knowing the difference, since the two are often confused. A clipping path works best on subjects with defined, hard edges. For subjects with soft or complex edges — hair, fur, fabric with fringe, or semi-transparent materials — you need image masking instead, which blends pixel by pixel rather than cutting along a single line.
Why Product Photos Need a Clipping Path Service
Online shoppers can’t touch or try a product before buying, so the photo is doing all the selling. A clean, consistent background:
- Meets marketplace image requirements (Amazon, eBay, and most marketplaces require a pure white background on the main image)
- Makes your catalog look consistent across hundreds or thousands of SKUs
- Removes distractions like dust, wrinkled backdrops, or shadows from the studio setup
- Lets you reuse one product shot across your website, marketplace listings, and ads with different backgrounds for each
For photographers and studios, offering (or outsourcing) a reliable clipping path service also means faster turnaround for clients without sacrificing quality — which matters when a client needs 200 product shots back by Friday.
How to Create a Clipping Path in Photoshop
If you want to try it yourself, here’s the process a professional retoucher follows:
- Open the image in Photoshop (File > Open).
- Select the Pen tool from the toolbar.
- Zoom in (around 200–300%) and start placing anchor points tightly around the edge of your subject.
- Close the path by connecting your last anchor point back to the first.
- Convert the path to a selection with
Ctrl/Cmd + Enter. - Feather the selection slightly (
Select > Modify > Feather, orShift + F6) so the edge doesn’t look jagged. - Duplicate the background layer, apply the selection as a layer mask, and delete or replace the background behind it.
- Zoom in on the edges to check for stray pixels or gaps before exporting.
It’s a straightforward list of steps, but the execution is where experience matters — a rushed pen-tool path on a product with curves, holes (like a mug handle), or reflective edges is easy to spot, and it’s the kind of flaw that quietly hurts conversion rates.
DIY vs. Professional Clipping Path Service: Which Should You Choose?
| DIY (yourself or AI tool) | Professional Clipping Path Service | |
|---|---|---|
| Best for | Simple shapes, one-off images, tight budget | Bulk catalogs, complex edges, brand-consistent output |
| Speed | Slow if you’re learning; fast for simple shapes with practice | Fast turnaround at scale, even for hundreds of images |
| Quality on tricky edges | AI tools often leave halos or miss fine detail | Manual pen-tool precision holds up on close inspection |
| Consistency across a catalog | Hard to keep uniform manually | Standardized process across every image |
If you’re editing a handful of simple, sharp-edged product shots occasionally, a free background remover might be enough. Once you’re dealing with volume, marketplace compliance, or anything with curves and reflections, outsourcing to a dedicated clipping path service usually saves more in time and returned/rejected listings than it costs.
How to Choose the Best Clipping Path Service Provider
Not all providers deliver the same quality. Before you commit, check for:
- Sample work on images similar to yours — jewelry, apparel, and electronics all present different challenges, so ask to see relevant samples.
- Clear communication and turnaround times, especially if you’re sending recurring bulk orders.
- Revision policy — a provider should revise until you’re satisfied, not charge extra for reasonable edits.
- Transparent, predictable pricing with no surprise per-image add-ons.
- Data security practices, particularly if you’re sending unreleased product photography.
- A free trial or sample edit so you can judge quality before committing to volume.
Common Mistakes to Avoid When Outsourcing Clipping Path Services
- Sending low-resolution source images. A clean path can’t fix a blurry original.
- Skipping a trial edit. Always test with 1–2 images before sending a full batch.
- Not specifying background requirements. “White background” isn’t the same on every marketplace — confirm hex values or platform specs upfront.
- Ignoring shadow needs. A flat cutout can look unnatural; ask about shadow creation if you want a realistic drop or reflection shadow.
- Choosing based on price alone. The cheapest clipping path service often means the most revision rounds — which costs you time instead of money.
Clipping Path Service Pricing: What to Expect
Pricing typically depends on image complexity (a simple product on a plain background costs less than a complex shape with holes or fine detail), turnaround time, and order volume. Most providers price per image with volume discounts for bulk orders, and many — including simpler clipping paths — can be turned around within 24 hours. It’s worth requesting a quote based on your actual images rather than relying on a generic price list, since complexity varies so much from product to product.
Final Thoughts
A clipping path service isn’t just a technical editing step — it’s part of how your product actually performs online. Clean, consistent images build trust, meet marketplace requirements, and make your whole catalog look professional. Whether you handle it in-house with the Pen tool or hand it off to a dedicated team, the goal is the same: images that help customers say yes.
Need clean, marketplace-ready product photos without the learning curve? Try Photo Clipping Path BD free — send us a sample image and see the quality before you commit to a full order.


Cassandra
May 3, 2022Nice post. I used to be checking continuously this blog and I am inspired!
Very helpful information specifically the remaining phase 🙂 I deal with such info a lot.
I was looking for this particular information for a long time.
Thank you and good luck.
Check out my web site; Cheapest Digital Books
admin
May 11, 2022Thanks for your comment,stay with us .
Josephine
July 13, 2022Hi Dear, are you in fact visiting this web page on a regular basis, if
so then you will definitely get good know-how.
Take a look at my webpage :: buy instagram likes $5
Toslim Ahamed
August 10, 2022Thanks for your comment, stay with us.